|
| Recent Posts | - May, 2025-5,(1)
- April, 2025-4,(1)
- January, 2025-1,(1)
- July, 2024-7,(1)
- May, 2024-5,(2)
- May, 2023-5,(1)
- February, 2023-2,(1)
- November, 2022-11,(1)
- July, 2022-7,(2)
- March, 2022-3,(1)
- November, 2021-11,(2)
- August, 2021-8,(2)
- July, 2021-7,(2)
- June, 2021-6,(1)
- May, 2021-5,(1)
- March, 2021-3,(1)
- February, 2021-2,(2)
- January, 2021-1,(7)
- December, 2020-12,(3)
- March, 2020-3,(2)
- February, 2020-2,(1)
- December, 2019-12,(2)
- November, 2019-11,(1)
- October, 2019-10,(1)
- September, 2019-9,(1)
- August, 2019-8,(1)
- May, 2019-5,(1)
- April, 2019-4,(2)
- March, 2019-3,(2)
- December, 2018-12,(1)
- November, 2018-11,(4)
- July, 2018-7,(1)
- May, 2018-5,(3)
- April, 2018-4,(2)
- February, 2018-2,(3)
- January, 2018-1,(3)
- November, 2017-11,(2)
- August, 2017-8,(1)
- June, 2017-6,(3)
- May, 2017-5,(5)
- February, 2017-2,(1)
- December, 2016-12,(1)
- October, 2016-10,(2)
- September, 2016-9,(1)
- August, 2016-8,(1)
- July, 2016-7,(1)
- March, 2016-3,(2)
- February, 2016-2,(3)
- December, 2015-12,(5)
- November, 2015-11,(5)
- September, 2015-9,(1)
- August, 2015-8,(2)
- July, 2015-7,(1)
- March, 2015-3,(2)
- February, 2015-2,(1)
- December, 2014-12,(4)
- July, 2014-7,(2)
- June, 2014-6,(2)
- May, 2014-5,(3)
- April, 2014-4,(3)
- March, 2014-3,(1)
- December, 2013-12,(2)
- November, 2013-11,(1)
- July, 2013-7,(1)
- June, 2013-6,(2)
- May, 2013-5,(1)
- March, 2013-3,(3)
- February, 2013-2,(3)
- January, 2013-1,(1)
- December, 2012-12,(3)
- November, 2012-11,(1)
- October, 2012-10,(1)
- September, 2012-9,(1)
- August, 2012-8,(1)
- July, 2012-7,(6)
- June, 2012-6,(1)
- April, 2012-4,(1)
- March, 2012-3,(3)
- February, 2012-2,(3)
- January, 2012-1,(4)
- December, 2011-12,(3)
- October, 2011-10,(3)
- September, 2011-9,(1)
- August, 2011-8,(10)
- July, 2011-7,(2)
- June, 2011-6,(7)
- March, 2011-3,(2)
- February, 2011-2,(3)
- January, 2011-1,(1)
- September, 2010-9,(1)
- August, 2010-8,(2)
- June, 2010-6,(1)
- May, 2010-5,(1)
- April, 2010-4,(3)
- March, 2010-3,(2)
- February, 2010-2,(3)
- January, 2010-1,(1)
- December, 2009-12,(3)
- November, 2009-11,(3)
- October, 2009-10,(2)
- September, 2009-9,(5)
- August, 2009-8,(3)
- July, 2009-7,(9)
- June, 2009-6,(2)
- May, 2009-5,(2)
- April, 2009-4,(9)
- March, 2009-3,(6)
- February, 2009-2,(4)
- January, 2009-1,(10)
- December, 2008-12,(5)
- November, 2008-11,(5)
- October, 2008-10,(13)
- September, 2008-9,(10)
- August, 2008-8,(7)
- July, 2008-7,(8)
- June, 2008-6,(12)
- May, 2008-5,(14)
- April, 2008-4,(12)
- March, 2008-3,(17)
- February, 2008-2,(10)
- January, 2008-1,(16)
- December, 2007-12,(6)
- November, 2007-11,(4)
|
|
|
|
Blog posts for the month of May,2014.
|
|
|
| Adding Storage to a SQL Server Always-On Cluster | 5/10/2014 7:42:41 AM |
Adding Storage to a SQL Server Always-On Cluster.

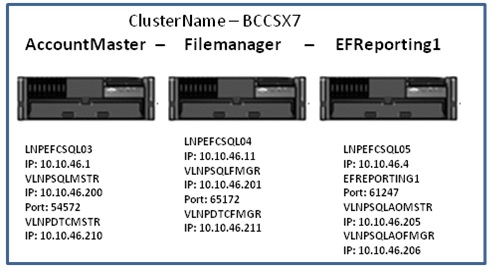
This is specific to adding storage, specifically one new drive (or mount point), for one database, to a 3-node Cluster, hosting 2 SQL Server Fail-over instances, using Always-on to a 3rd instance on the 3rd node. ( Image 1)
Exact Scenario:
AccountMaster needs additional storage.
Currently two databases share the same drive (mount point) and we need additional space as well as isolate the i/o from the two databases.
The databases have an always-on node of EFReporting1.
The goal is to add storage to AccountMaster and EFReporting1, and move one of the databases on to the new storage.
In order to accomplish this storage must be zoned from SAN to cluster used by AccountMaster, physical machines LNPEFCSQL03 and LNPEFCSQL05. Storage must also be soned to the Always-on node, which uses the storage as a stand-alone instance. So a shared cluster LUN must be zoned to two servers, and a LUN of the same size zoned to LNPEFCSQL05. This is accomplished by the SAN Administrator.
Once completed, verify that the new storage is “visible”, and that it is not the same LUN. I do this by checking the LUN Number via power path, an EMC Utility started from the system tray. It is also possible to verify the LUN number via other EMC utilities.
Screen shots below, note, they must be different LUN numbers, you cannot have a shared LUN also used by the stand-alone always on node.
Screen Shot of PowerPath from server LNPEFCSQL03: (Image 2)

Screen Shot of PowerPath from server LNPEFCSQL05 (Image 3)

Notice the Disk Numbers are the same, but have different LUN numbers, so they are not the same devices.
Now you can proceed to importing the disk in disk manager.
On the SQL Server Fail Over Cluster (LNPEFCSQL03), bring the disk online (right click), than initialize the disk (right click again, dialog appears. (Image 4 and 5)


Connect to cluster manager and find “Storage”, right click and select add storage. You should see the new disk. In this picture below there are a bunch of other disks, make sure they are unchecked. (Image 6)
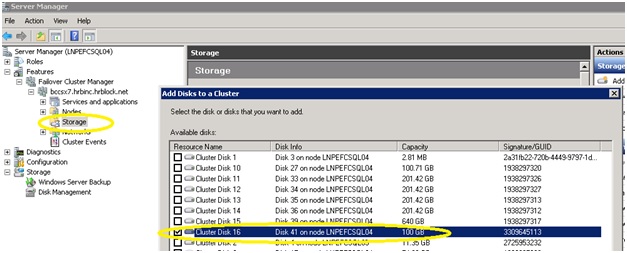
Once the disk is imported into cluster manager, right click on the disk and choose properties. Use this dialog to name the disk to your standards. (Image 7)
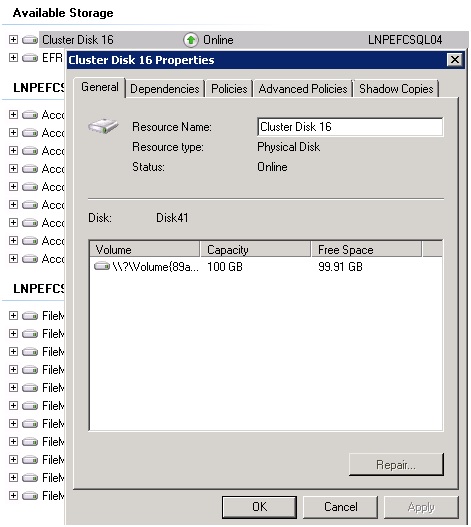
Once the disk is named appropriately, move it to the correct resource group so it can be used. (Image 8)
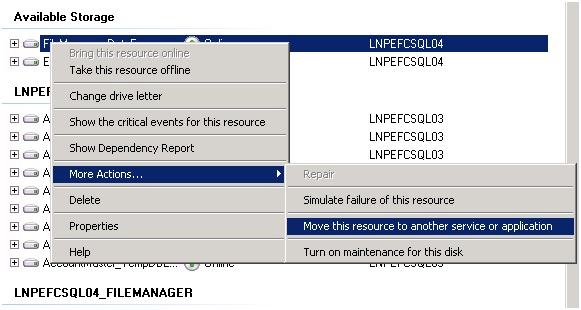
• There have been issues with these 3 node clusters,when only two nodes of the cluster are to receive the new storage. The disk will not come online sometimes, claiming an issue with the node that can’t “see” the storage. I’ve resolved those instances by rebooting that node. It is as if the cluster qurum is actually on that node and it wants to see the storage, by rebooting that node the quorum “moves” to one of the nodes that can “see” the storage. Than all is well.
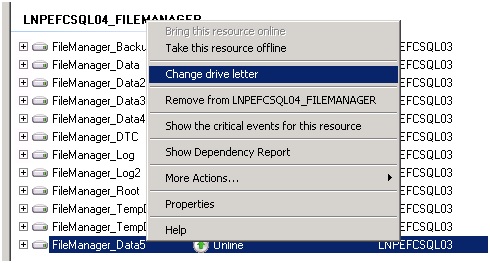
Once in the correct group, right click on the disk so it can be assigned a drive letter or mountpoint depending on which you are using. If using a mountpoint make sure the root is set as a dependency in the properties. (Image 9)
Now switch to the Always-on node and confifure that storage. Ideally storage for the always-on node matches the storage for the primary node (either mount-point or drive), G = G etc. In this instance it is not possible to make the match because we have two sql instances sharing the same always on instance, and we would run out of drive letters to make them the same. (Keeping the drive letters the same is not a requirement, it just makes it easier to use the wizard to setup and restore the different databases because the drive letters are the same.) In this case they are not the same.
Bring the new drive on the Always-on node (05) online: (Image 10 and 11)

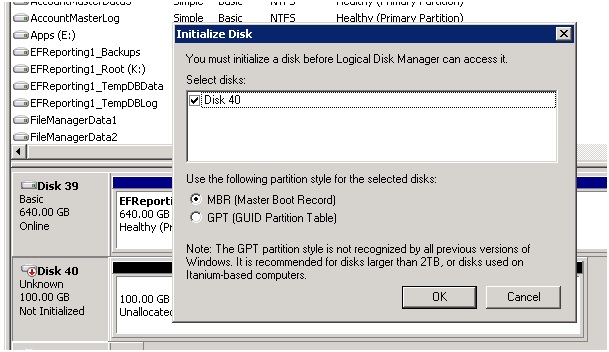
Once online, initialize it:
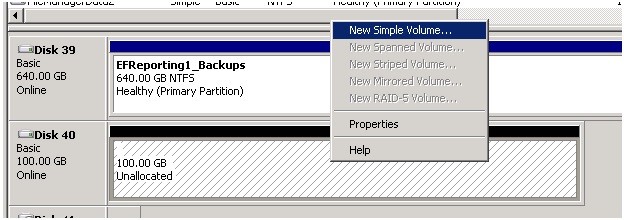
Once initialized, format it to your standards and assign it a drive letter or in this case a mount point, ensure the directory you are using for the mount point exists prior to doing this: (Image 12)
Now assign it a mount point: (Image 13)
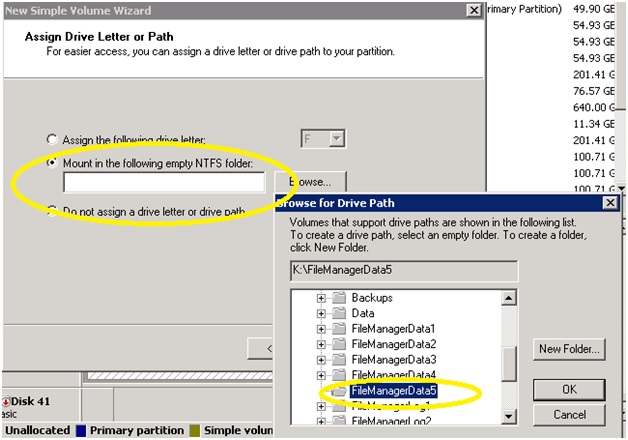
Now that both servers have the correct storage, the database work can begin.
The goal of adding storage was to move an existing MDF for database that was sharing storage with another databases MDF file. In order to do this an outage will occur, it could be possible to do this in such a way that minimizes or does not cause an outage, but this is the simplest quickest way.
Both existing databases are participating in always-on availability groups. User Access Controls (UAC) are enabled on most servers, so ensure to always start Visual Studio with the “Run as Administrator”, it has made a difference before when “attaching / detaching and restoring databases for me”. (Image 14)
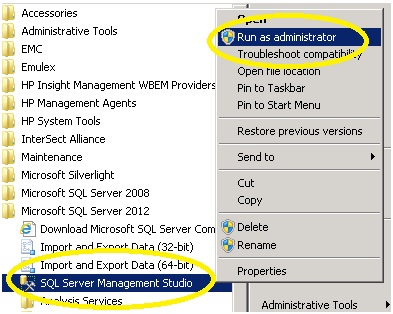
The steps are:
1. Stop (disable) any transaction log jobs on both servers.
2. Remove the database from the Availability Group. (Image 15)
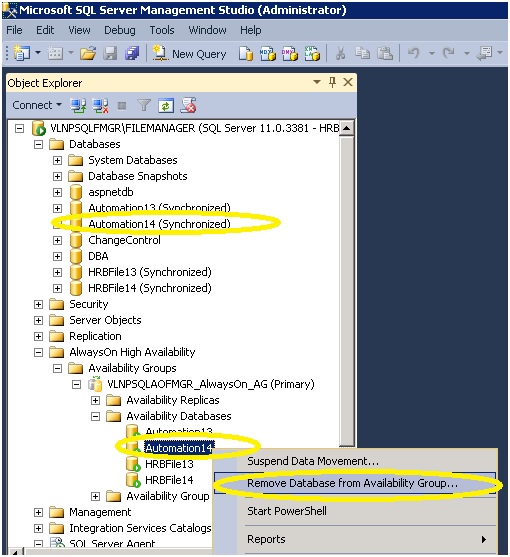
3. Now you can detach the database and move the mdf file to the new drive.
4. Now attach the mdf file back
5. Ensure to go to the “Always-On” Node and detach the database
a. I have had issues with this
b. I’ve had to issue a “restore database with recovery”
c. Then detach
6. Move the mdf file on the “Always-On” node to the new drive
7. Now on the primary node you can add the database back to the availability group
a. I’ve had issues where this did not work, and I had to take a “fresh” backup to restore to the always-on node and even an instance where I then had to take a tlog backup, so the general issues of setting up always on begin to apply here.
|
| Late Frost in Pleasant Hill MO | 5/16/2014 8:43:15 PM |
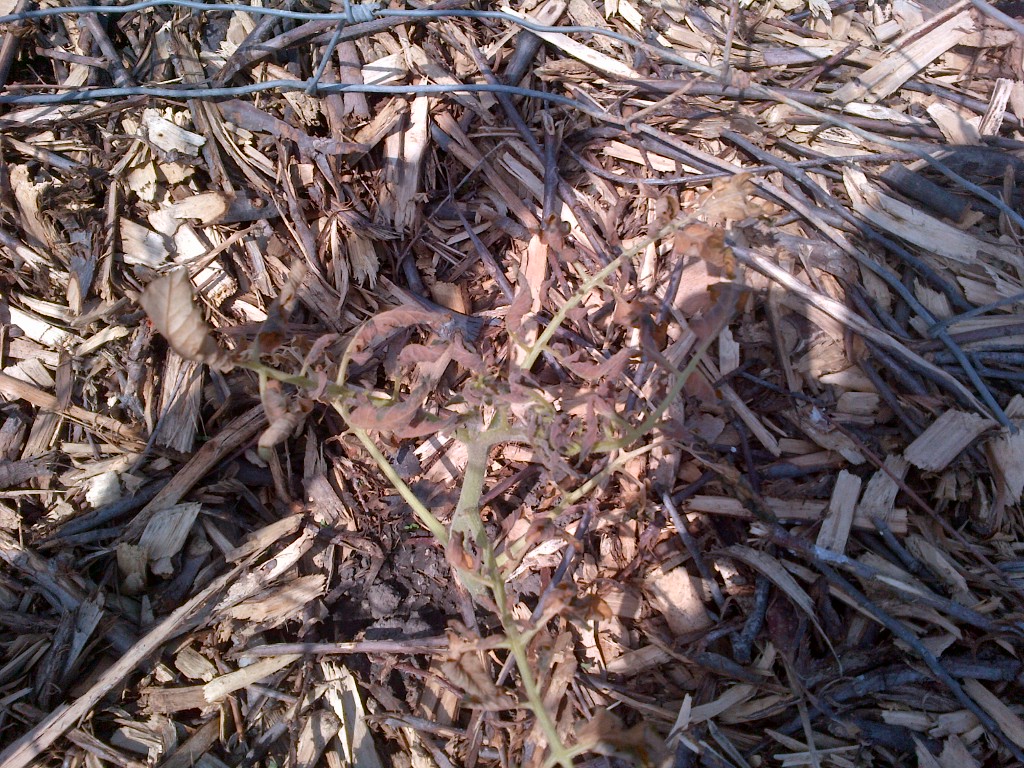
Very late frost this year, lost a few yearling trees and about 30 tomato plants, Potatoes look nipped but may still make it.
 |
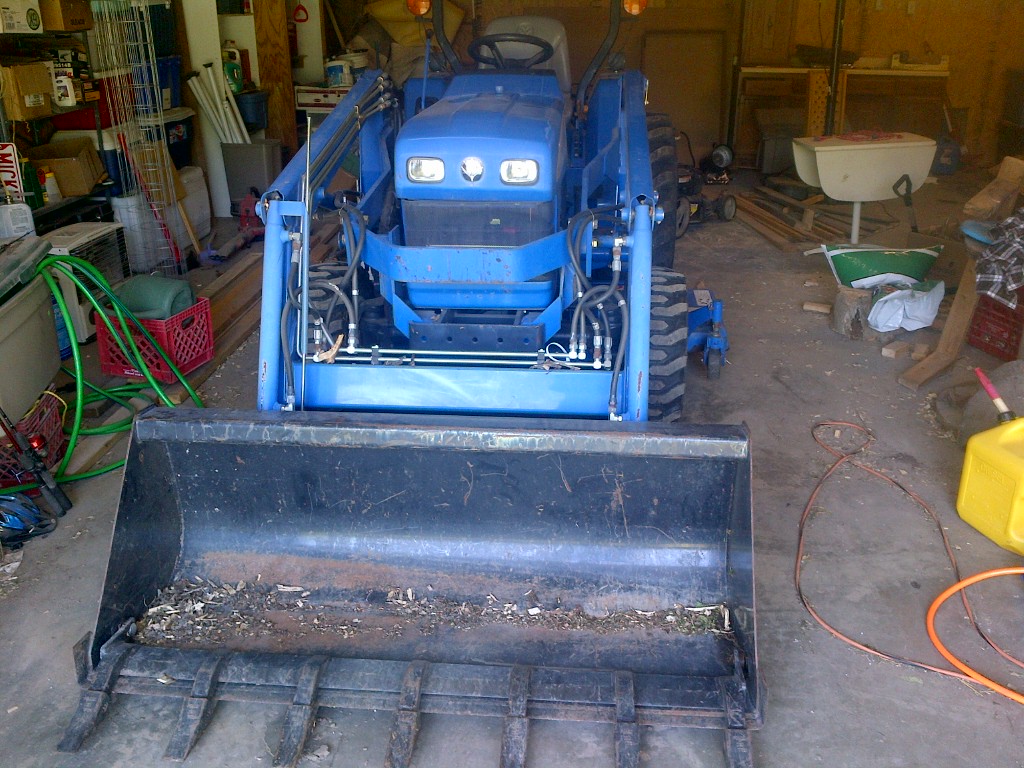
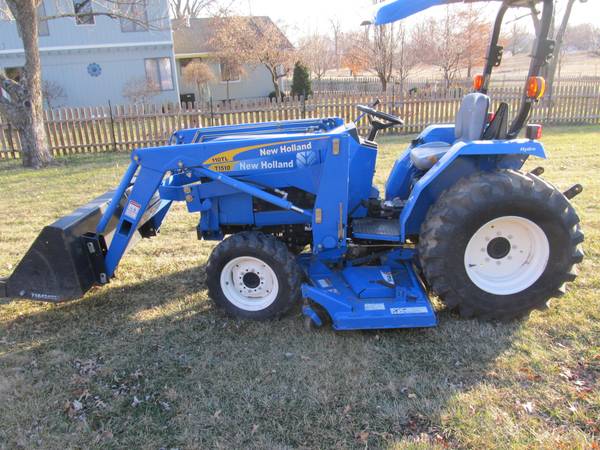
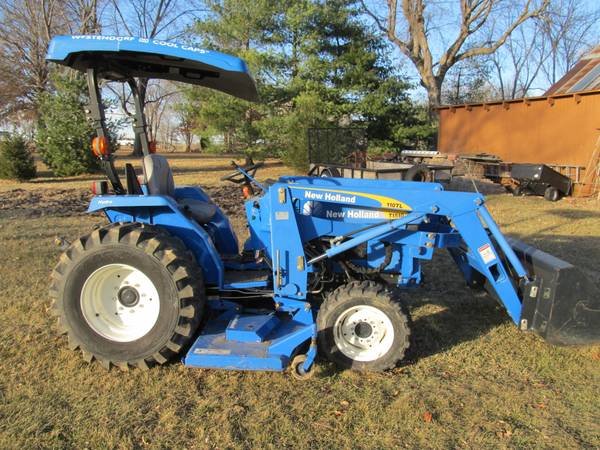
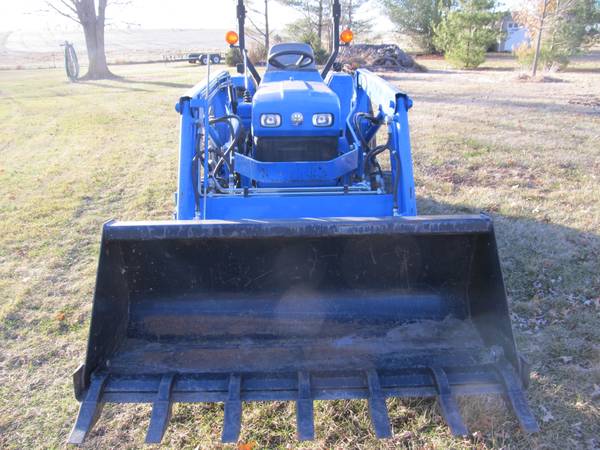
| New Holland T1510 with Loader | 5/19/2014 7:35:33 AM |
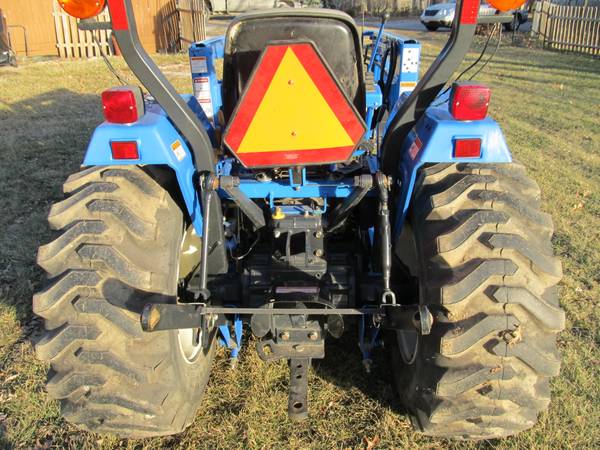
Wow, just picked up a little blue tractor, New Holland T1510 with loader and MMM (Mid-Mount Mower).
New Holland Boomer T1510 tractor, it has a 3 cylinder Diesel Engine that produces 30 horsepower. The Boomer T 1510 tractor has a category 1 three point hitch and its pto is rated at 25.5 hp. This New Holland tractor has hydrostatic power steering and is 4WD.
http://www.tractor.com/manufacturers/new-holland/2011-new-holland-t1510-review-1466.html
Very nice little work horse, boring, boxy, but solid as can be.




|
|
Blog Home
|
|
|
|